> ## Documentation Index
> Fetch the complete documentation index at: https://docs.pnplayer.com/llms.txt
> Use this file to discover all available pages before exploring further.
# Videos
> Learn how to upload, manage, caption, chapter, embed, and analyze your videos step by step from the dashboard.
## Upload Video
To upload a new video, follow these steps:
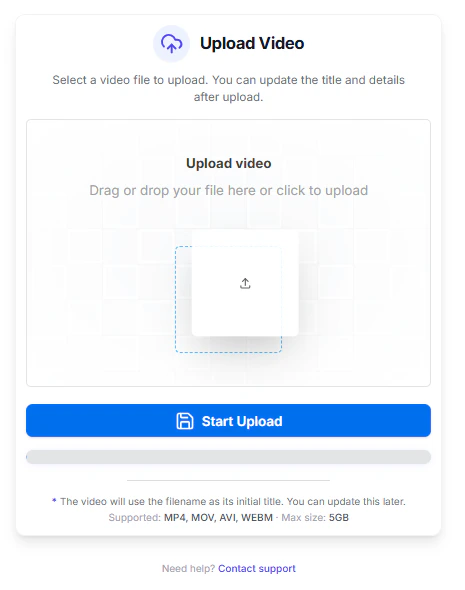 Navigate to the Videos dashboard and click the Upload Video button.
Choose a file from your device (MP4, MOV, AVI, or WEBM up to 5GB).
Monitor the real-time upload progress with resumable support enabled.
After upload completes, update the title and description if needed.
Click save to finalize and publish the uploaded video.
## Captions
To manage captions for your video, follow these steps:
Navigate to the Videos dashboard and click the Upload Video button.
Choose a file from your device (MP4, MOV, AVI, or WEBM up to 5GB).
Monitor the real-time upload progress with resumable support enabled.
After upload completes, update the title and description if needed.
Click save to finalize and publish the uploaded video.
## Captions
To manage captions for your video, follow these steps:
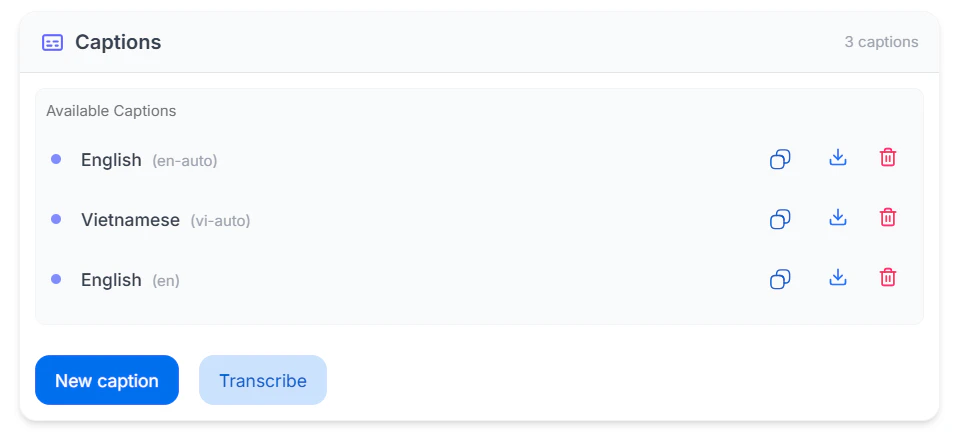 Select your video and navigate to the Captions section.
Enter a label, provide the language code, and upload a .vtt file.
Choose a language and confirm to automatically generate captions.
Use action buttons to download, copy the link, or delete captions.
## Chapters
To add and manage video chapters, follow these steps:
Select your video and navigate to the Captions section.
Enter a label, provide the language code, and upload a .vtt file.
Choose a language and confirm to automatically generate captions.
Use action buttons to download, copy the link, or delete captions.
## Chapters
To add and manage video chapters, follow these steps:
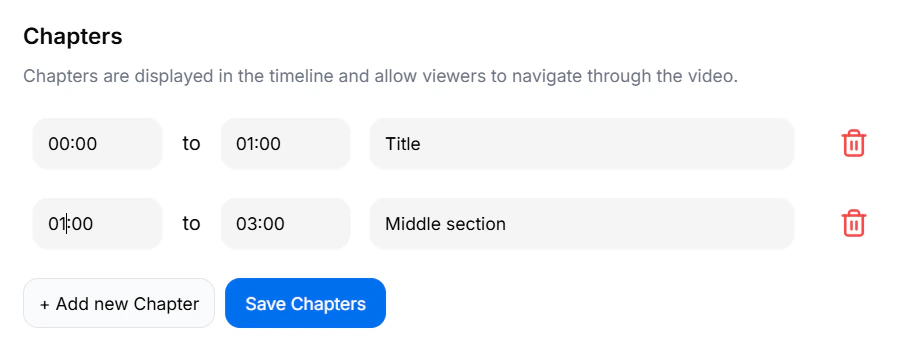 Navigate to the Chapters section of your selected video.
Click Add New Chapter and enter start and end time in MM:SS format.
Provide a title that describes the section of the video.
Modify time/title fields directly or click delete to remove a chapter.
Click Save Chapters to store the changes.
## Embed
To embed your video on an external website, follow these steps:
Navigate to the Chapters section of your selected video.
Click Add New Chapter and enter start and end time in MM:SS format.
Provide a title that describes the section of the video.
Modify time/title fields directly or click delete to remove a chapter.
Click Save Chapters to store the changes.
## Embed
To embed your video on an external website, follow these steps:
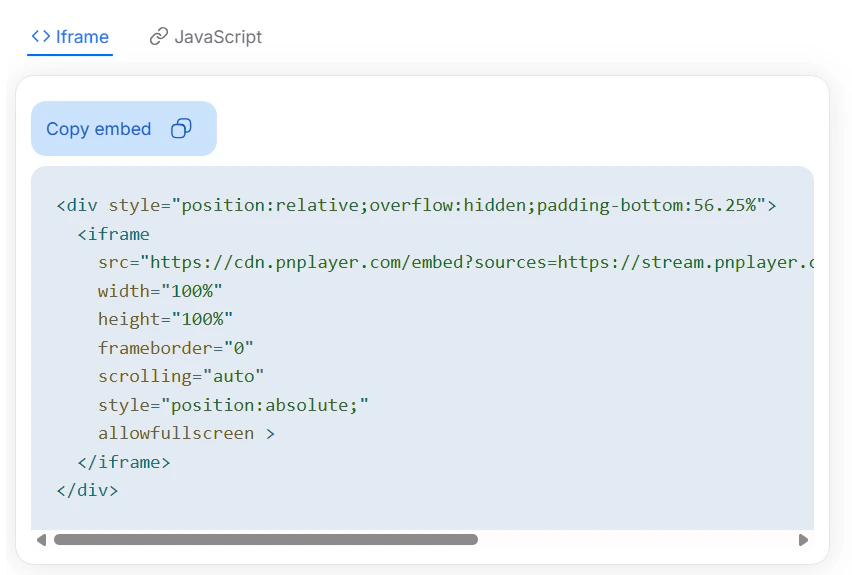 Select the video and navigate to the Embed section.
Enable responsive layout and fullscreen options if required.
Copy the generated iframe embed code.
Paste the iframe code into your website’s HTML where you want the video to appear.
## Analytics
To analyze video performance, follow these steps:
Select the video and navigate to the Embed section.
Enable responsive layout and fullscreen options if required.
Copy the generated iframe embed code.
Paste the iframe code into your website’s HTML where you want the video to appear.
## Analytics
To analyze video performance, follow these steps:
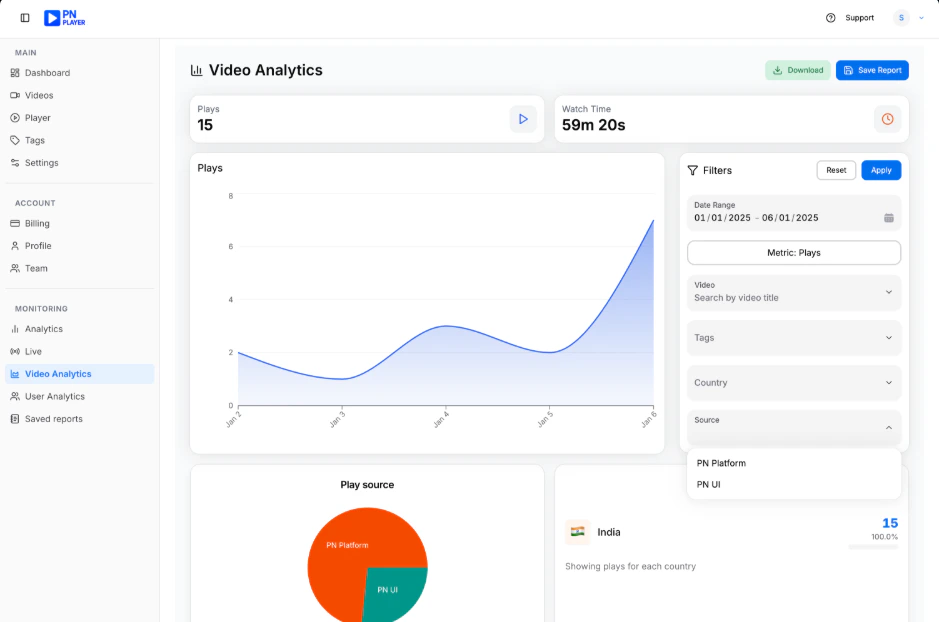 Navigate to the Analytics section of the selected video.
Check total Plays and Watch Time displayed at the top.
Choose start and end dates to filter analytics by timeframe.
Select a metric from the dropdown to update dashboard data.
Use video and tag filters to narrow down performance data.
Analyze engagement by traffic source or viewer country.
Study the trend graph and pie chart for performance insights.
Compare watch time and plays across videos.
Export analytics data for reporting or sharing.
Clear applied filters to return to the default analytics view.
Navigate to the Analytics section of the selected video.
Check total Plays and Watch Time displayed at the top.
Choose start and end dates to filter analytics by timeframe.
Select a metric from the dropdown to update dashboard data.
Use video and tag filters to narrow down performance data.
Analyze engagement by traffic source or viewer country.
Study the trend graph and pie chart for performance insights.
Compare watch time and plays across videos.
Export analytics data for reporting or sharing.
Clear applied filters to return to the default analytics view.